New Tear Sheets from our Recent Product Photography Shoot with ENO, and Our New 360 Product photography Capabilites

I am excited today to add new product photography tear sheets to our tear sheets page, and to give an update on TAP Photo Studio’s new service offerings! 

In 2022 TAP Photo Studio is better equipped than ever to provide product photography services here in Asheville NC and beyond.  TAP Photo Studio is committed to bringing clients the very best visual assets for their new product launches. In addition to state-of-the-art product stills, we are expanding our catalog this year to include interact-able 360 product imagery. our first 360 is live, check it out at intralight.co .

Interact-able (click and drag) HTML5, 360 imagery with pop-up notes is a powerful tech. to help your products stand out and be fully explored and appreciated by your customers. Give us a shout if you want to see some samples and learn more about our 360 product photography offerings. We will make sure to let new and existing clients know about this offering when we think it could be a benefit to them. 

Providing product photography services in Asheville, NC for the past six years continues to be one of my life’s great privileges. Thank you for your continued business, Asheville!

Product Photography: Our New Gemstone Product Photography Portfolio

Precious stones are one of the most challenging product photography subjects that we have encountered in the studio. When you photograph jewels you are in a way photographing the set-environment around the gemstone. Gemstones filter and reflect what’s around them. Their sparkle operates through the facet lenses on the stone catching the surrounding light and reflecting and refracting that light to the viewer.

After nearly a year of development and production our catalog of gemstones is quickly becoming it's own stand alone body of work, and one of my favorites. Our new Gemstones portfolio highlights some of our favorite images from the project so far and some of the most technically difficult images from the project.

I would like to write a few blog posts on some tips and tricks we use to take these shots and our methodology for photographing and post processing gemstone photographs. Like a lot of what we do we shot and processed our gemstones on pure white backgrounds, so we could discuss this as well. There are just so many fascinating factors to discuss! Another complicating factor is that photographing rubies has a different set of challenges from photographing sapphires, photographing emeralds, photographing opals, and the list goes on and on. Different precious stones, under the same light, will react in drastically different ways! I hope I find that people are interested in learning more about my take on this classic photography challenge.


White Backgrounds in Your Product Photography with Photoshop

We just made our first Youtube Tutorial! In this video you learn how to achieve professional white backgrounds to meet amazon image requirements. What do you think?

Replace an off white background with a pure white background quickly and professionally using Photoshop. Don't just quick select! Your products deserve better. Follow these steps when preparing and optimizing your DIY product photography for listing on Amazon or for whatever else on white image needs you may have.

Small product photography shoot. Photographing products on pure white backgrounds with minimal post processing.

We just finished shooting for another local Asheville nc honey company, Tjo Honey. This product is a beautiful, raw, unfiltered honey that we shot in two sizes, one larger in glass and a smaller in plastic. Because the honey was raw this time, and much less translucent than processed honey, we couldn't illuminate the product from the back by bouncing light or aiming light through it, so special attention was paid to illuminating the surface of the honey in a descriptive way.   

How we shoot small products on a white background, tips and tricks and some advanced photography techniques:

The general lighting setup for this shoot is drawn below. The equipment used was white seamless background paper, 3 strobes, two softboxes, four boom arms of varying sizes, flimsy small boom arms work great for holding up diffusion cloth, a table top, a camera and tripod, and a computer to tether too. All of this in a room with controllable light. A good way to test and see if your lighting setup is not mixing with uncontrolled ambient light is to disconnect your flashes and take a picture (without changing any camera settings). The image that you capture should be black indicating that no ambient light is competing with your set-up.

Once you are set up the next task is to set the camera and balance the light. Take a camera and put a lens on it, I used a 55mm lens. That's probably as wide as you would want to go. Use a 50mm or an 80, or 100 or 200. Note your close focusing distance.

Here is a good starting point for your camera: set your camera on manual, your ISO to 100, your shutter speed to 1/160th of a second and your aperture to F11.

For your lights: I would first turn on the large softbox on the left, and adjust its output to render a nice high-key exposure on the bottle. Then turn on the back strobe. You want the background to be two stops brighter than the light cast on the bottle and tabletop. Use a light meter if you have one, or you can rely on the histogram. You want to achieve 99% of your pure white background in the camera, but don't overdo it or light will spill off the background and onto the edges of your subject. Then play around with the back right rim light, try to see if there are any positions that highlight features of the bottle like the ridges on the larger honey jar. This light will be much weaker than the other two, and only used to add some sculpting light to the opposite side of the main light.

At this point the image is almost formed and ready for some post processing. An inevitable issue at this step will be the tabletop itself being not pure white like the background. There are multiple ways to address this in post, or in the camera, depending on your particular situation. Adjusting whites and highlight in adobe camera raw could potentially fix the problem, or get you very close to 255,255,255 white (that's pure white in the RGB decimal code or in HEX code #ffffff). You could select out or paint out the bottom. Or, if you want to achieve pure white completely in camera use a translucent table top and light it from the bottom. Or use a transparent table top and light a white card behind the plexi about 2 stops above the exposure of the product like the background. You could also extend the seamless paper in a long sweep instead of having a separate white card.

Now that you produced a near on white image, the post production work to complete a true 255 white background all around should be very minimal. Use color select in Photoshop to make a selection of your background, or to test and see if you have accomplished your pure white background task. Select it out and used layers>new adjustment layer>levels to achieve the white background. Adobe camera raw adjustments can all but completely process your files if you did things right. Use the highlights and whites sliders. If these adjustments are negatively affecting the product: process out two versions of the raw file open them as two different layers of the same file and then select and mask!

We love this Asheville nc local honey are happy with our finished product. We hope this helps give you some more tips and tricks for producing beautiful on white small product photography wherever you are.


Product photography: photographing a local Asheville, nc tallboy and setup and lighting tips

We photographed some great, popular Asheville, nc beer from Burial Beer Company.  It was a lot of fun to shoot because their can art is really cool and the large amount of aluminum that is visible under and around their label reflects light very well. As is the case with highly shiny things, like this can, the direct light illuminating the surface has to be heavily diffused, and polarized, to mute the brilliance of the surface. Here's how we did it: 

In this case, 2 soft-boxes, which are made up of 2 layers of cloth panels that are further diffused by 2 larger, 6' x 6', panels make a very large, even and soft  light source. Along with a polarizer on the camera to further cut down on reflection, the large vertical highlights rest on the can without blowing out the surface or reflecting heavily off the label. This is also how the light achieves its taper. The strobe overhead illuminates the background and part of the top of the can. A small piece of black foil shields some of the light from the octabox above the product. Two black cards, about 5'' by 18'' reflect off the outer edges of the cans creating a darker, contrasting edge that allows this high key product shoot to stand out against a white background.   

The product was cleaned and prepped with a 45% solution of glycerin that was applied with a small atomizer and left to partially dry. There is a piece of polished white plexiglass about 2' x 2' that is sitting on top of the white paper background. 

setup diagram / lighting diagram. Things aren't exactly to scale here, but this should help you visualize the lighting setup. What's important to remember is that the can 'sees' everything around it. To light it you have to effect all of its surroun…

setup diagram / lighting diagram. Things aren't exactly to scale here, but this should help you visualize the lighting setup. What's important to remember is that the can 'sees' everything around it. To light it you have to effect all of its surrounding surfaces. 

I brought an icicle into the product photography studio and some photography lighting tips

Ice photographs a lot like glass, and not surprisingly. But unlike the glass that we like to photograph in the studio, ice often has a foggy and cracked structure and surface. This is something that normally we would diminish in professional product photography shoots, here we've played it up. With careful lighting, the impurities and cracks in this icicle cause the light to bounce around its own structure making the icicle appear to glow white. And from a design aesthetic I thought it was a very beautiful, natural structure! One of the two water droplets was composited from another shot in this series during post production editing. It's was very difficult, and very fun, to try to time and capture these droplets without using any sort of a motion trigger.


product photography asheville nc_icicle studio shot_Kepchar0057.jpg

Now for some setup and lighting tips: The icicle is back-lit almost entirely, though there is a large silver reflector on the left side at an approximate 90 degree angle to the camera. There is a soft-box, main light on the right and a small rather harsh strobe on the left that shines through the ice, illuminating it. The large silver reflector on the left side close to the object illuminates the leaves, though the relative size of the soft-box also helps do that as well. The dull blue glow on the right side of the background is due to the background being so close to the soft-box (apparently we need a bigger piece of black velvet in the studio!). This was a big concern for me during setup, but I ended up being quite happy with the gradient that was created, and it would be manageable enough to be easily removed in post if desired. 

The soft box on the right Its only forward enough to cast the small, sharp, rim light on the right side of the icicle while its main purpose is back-lighting the ice.

The soft box on the right Its only forward enough to cast the small, sharp, rim light on the right side of the icicle while its main purpose is back-lighting the ice.


Spec product photography for a local Asheville nc honey company, and some lighting tips on how we shot it

We recently did another speculative commercial product photography shoot, this time for Asheville Bee Charmer. I love Honey, and I thought it would be a great product to shoot both because it is delicious and because of the inherently beautiful colors of honey.  To highlighting the product we illuminated the jars from the back in a rather unique way which I will explain below. The effect is a really great explanatory shot of the product that displays a maximum of information in an alluring commercial shot. I love the beautiful colors of this honey, and we hope Asheville Bee Charmer loves it too!

A little product photography tips:

Here you can see the Nikon fiber optic light which is shinning through a lens. The lens focuses the light onto the reflective paper behind the bottle and shines through the product towards the camera.

Here you can see the Nikon fiber optic light which is shinning through a lens. The lens focuses the light onto the reflective paper behind the bottle and shines through the product towards the camera.

A closer look at the lens, sitting on top of the housing it originally was used in. The lens is free to be moved to focus the beam of light.

A closer look at the lens, sitting on top of the housing it originally was used in. The lens is free to be moved to focus the beam of light.

An image with just the illuminating back-light. The lift arm supplies all the light for the back-light. The right arm of the fiber optic light is illuminating the backdrop to create some more shape on the side of the bottle.  

An image with just the illuminating back-light. The lift arm supplies all the light for the back-light. The right arm of the fiber optic light is illuminating the backdrop to create some more shape on the side of the bottle.  

The tabletop is glass covered with pure white paper. Underneath is a strobe with a 1/2 CTO gel to match the fiber optic's light temperature. 

The tabletop is glass covered with pure white paper. Underneath is a strobe with a 1/2 CTO gel to match the fiber optic's light temperature. 

Three more strobes fill in around the product, illuminating the label, lid, and background.

Three more strobes fill in around the product, illuminating the label, lid, and background.

I used a lens I am very fond of, a Nikon 55mm macro AI-S. One of the best lenses for product photography if you are willing to work with an older lens. Very sharp, very simple, and a plesure to use.

I used a lens I am very fond of, a Nikon 55mm macro AI-S. One of the best lenses for product photography if you are willing to work with an older lens. Very sharp, very simple, and a plesure to use.

Rules to paint by

For several years I (Merryn) took a portrait painting class through Art Alliance of Greensboro taught by the highly acclaimed portrait painter Tom Edgerton.  Tom is the kind of Art teacher that has answers and a formula for art. The kind of teacher many students pine for when they can't bear the teacher's vague, rambling answer on the shadows of post-impressionism in a post-modern world, when all they asked was what kind of pencil they should buy.  I loved my teachers that waded through the obscura of existence as they tried to make you answer difficult questions about the meaning of form and beauty through your work, but there are many kinds of art teachers (and believe me I have had more than a few on the way to my BFA).  Here I want to talk about what I learned from a much more direct teacher and then to reflect on the ways that his portrait painting guidelines have informed my approach to traditional and digital art.

"Tom's rules":  There are four main factors that guide the painting process, drawing, value, color and edges.  The factors that define color are value, hue, saturation and temperature.  Use these elements to make the viewer's eye go towards something by sharpening the edges, increasing the saturation or increasing the contrast.  Make the viewer's eye move away from something by softening the edges, decreasing the saturation or decreasing the contrast.  Changing the contrast is the strongest of these tools as value, the measure of lightness or darkness, is so crucial to effective, beautiful and professional looking work.  Understanding how to control edges was one of the most challenging things for me but don't be afraid to get in there and mush things around, it's one of the most rewarding things about oil painting and can be accomplished digitally as well.

There are a million things to be said about drawing but it is true that repetition and practice is the best way to improve.  Beyond that there are several visual aids that can help you get going. The thing is to start big and general and avoid jumping into detail too quickly (seriously, don't start with any details!), look for the major shapes and relationships first.  Use angles and how they are created by positive and negative space.  Use the longest straight lines you can to begin with.  Don't chicken scratch your way from point A to B, find main directional lines and define smaller plane changes and details later.  Use mapping to identify where these details should later be placed with crosses, tic marks or other descriptive visual cues that make sense to you.  These are easy to play around with and to move as you continue to find where the pieces fit in relationship to one another.  Use plumb lines, vertical and horizontal lines, either drawn or imagined to further compare angles and relationships of objects in the scene.  Similarly you can use grids to further accurately relate what you are drawing when working from life, or to further analyze composition when working from your imagination.  This is very easily accomplished when working digitally.

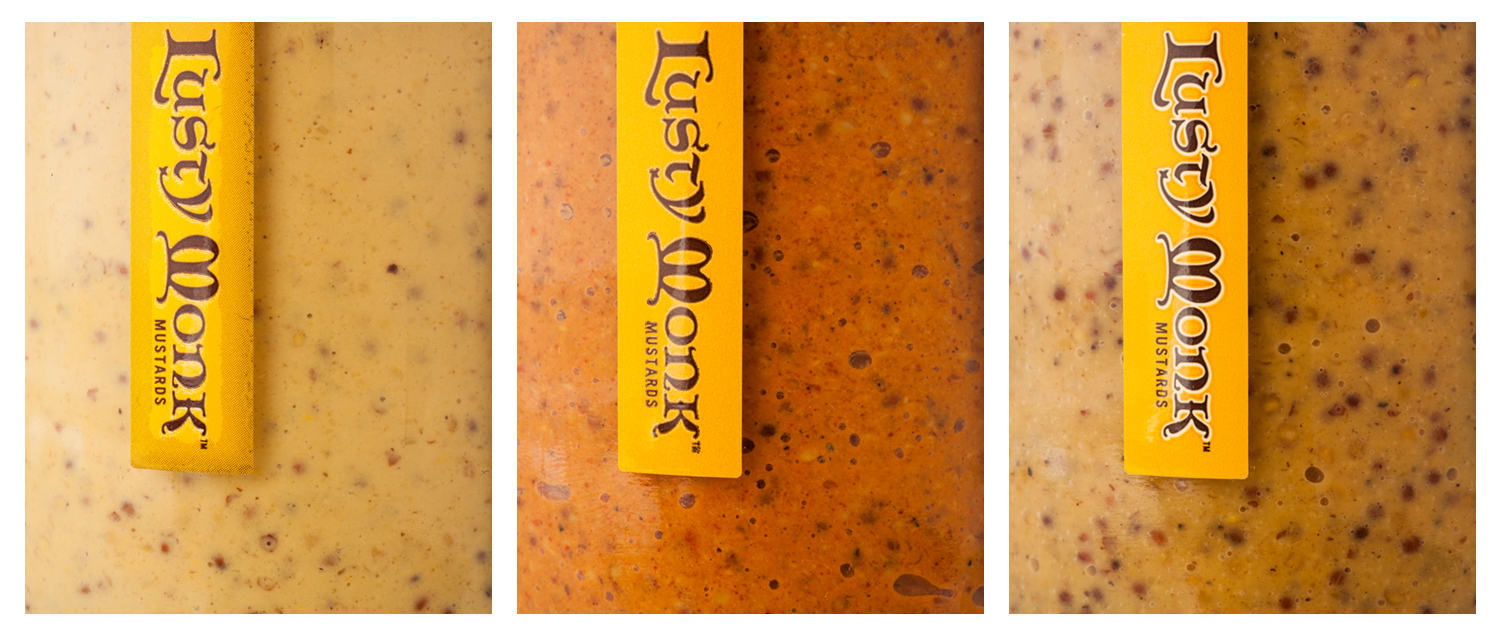
The final ingredient is to get to know your colors and color temperatures(warm and cool) and color charts are one of the best ways to do this.  I have many charts that i can quickly reference for color mixing and I use them all the time.  Mixing a value scale for a single color, or mixing a single color with every other one you have (Richard Schmid style) will work wonders for understanding your use of paints and the ways colors and temperatures work.  This information will help you understand the facets of color when you go to work in your digital palette too.  When you begin a new work don't forget to ask yourself what is the value, what is the color, what is the temperature?  Then start to lay down those large shapes that you have found.  Build up your canvas like a quilt with patches of color, covering the entire canvas before any detail will help you see where small value shifts need to happen before you become sucked in by with details.  A final note on the detail issue, sometimes Tom would push me to avoid detail until the last hour of work on a painting with 10 or so hours dedicated to it, so, seriously!  This infuriates people, but your perfectly painted detail will never work if the whole isn't working too.

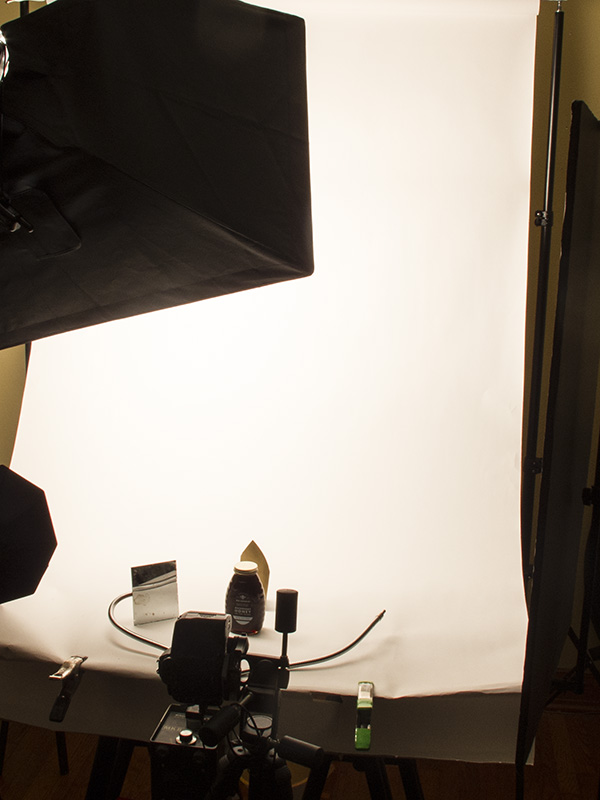
When it comes to the fine art world, there is definitely some stigma about technology.  Painting from photographs for example, because of the ways that the camera can alter reality and the values the naked eye sees, can be more of an impediment for the artists who doesn't have a great mindfulness of what they are looking at.  Computer monitors also replicate reality but screens and their resolutions vary greatly even between calibrated, professional monitors.  For John and I this is a continuing source of education as we work to understand the relationship between digital, print and traditional art media.  Working to translate my traditional art education background into the modern world or pixels has been a challenge, but I owe so much to Tom for putting these rules in my head and to all my art teachers that have taught  me how to work no matter the media.  So here's to the spectrum of art teachers and art!

Check out Tom's work here.

kep blog paint.jpg

Ode To Flusser's 'The Photograph'

Exciting couple of weeks coming up, we will be contacting a whole bunch of people! (maybe you are here because we just contacted you, that would be awesome!). And we will be getting some super nice prints made by HugPress (they used to be BullockPro). They are a great local printer! And some prints done at Henco, another great local printer.

Also, I wanted to share this photo I took while thinking about last week's post on Flusser who wrote 'Towards A Philosophy Of Photography'. I might add it to my order. It's a fake pear that cracked somehow, and the background is a crumpled up reflector. I really like the shape of the crack.    


Short Reflection on Vilém Flusser's 'The Photograph'

Once upon a time, in a class on existentialism at the University of North Carolina at Asheville, I came across the philosopher, Vilém Flusser, and I have been thinking about his collection of essays titled, Towards A Philosophy of Photography, ever since. I don't pretend to understand his work as a whole, but I want to share one of the interesting passages that resonated with me.  In the essay titled The Photograph, Flusser interprets Black and White and Color photographs and the different ways they convey information:

"many photographers... also prefer black-and-white photographs to colour photographs because they more clearly reveal the actual significance of the photograph, i.e. the world of concepts.

The first photographs were black and white and still clearly acknowledged their origin in the theory of optics. However, with the advance of another theory, that of chemistry, colour photographs were also finally possible. It looked as if photographs first abstracted the colours from the world in order to smuggle them back in. In reality, however, the colours of photographs are at least as theoretical as black and white.

...but between the green of the photograph and the green of the field a whole series of complex encodings have set in, a series that is more complex than that which connects the grey of the field photograph in black and white with the green of the field. In this sense the field photographed in green is more abstract than the one in grey. Colour photographs are on a higher level of abstraction than black-and-white ones. Black-and-white photographs are more concrete and in this sense more true: they reveal their theoretical origin more clearly, and vice versa: The 'more genuine' the colours of the photograph become, the more untruthful they are, the more they conceal their theoretical origin."(42-44)  -Vilém Flusser

This passage reminds me that photographs are, and always will be, abstractions of reality. Does the unending fine tuning of the digital image (the advancement of sensors, the expansion of latency, the advancement of color rendition etc.) add to the illusion of the image? Does this development in 'accuracy' hide the constrained nature of photography with its origins in optics, and chemistry? And does that create a type of deception for anyone who looks at photographs without this insight!?

I'm not sure. I think the ability to reproduce the colors of something 'more accurately' is beneficial when creating commercial photography of unique things as it translates more specific information about the thing. But this information may be 'more specific' relative to the ability of other cameras and not to the reality of color.  Perhaps part of the feeling of trickery in imagery, that we attribute to the digital age of photography, is rooted in the claims of 'accuracy' of images as well as the modification of them. 

Flusser, Vilém. Towards a Philosophy of Photography. London: Reaktion Books Ltd, 2000. Print.

Product photography: a set shot for Foggy Ridge Cider

Foggy Ridge Cider is our next speculative product photography shoot, and its another Appalachian cidery! The cider at Foggy Ridge has complex subtle flavors and this cider, 'Handmade', has a delightful development of flavor, and it really reminds me of champagne. It is full of carbonation and has a very light yellow, almost green, color. It is really delicious and crisp and goes great with a good brie.

For this commercial product shot we wanted to create a set. Something that placed this product in an environment that mirrors the spirit of the classic, yet complex flavors of the cider.  Here is a lighting tip, the spots of light in the background are actually a string of white Christmas lights that were placed in the bokeh of the lens far in the background. Somewhat overdone, but its beautful in the right type of setup. The image is rather nontraditional in the sense that it incorporates classic ideas of a still life into a modern and commercial looking background with a reflective black table top (which is black plexy by the way).

The two elements work together here to make a commercial shot that catches the eye while maintaining the spirit of classic simplicity that is true to this product. 

Product photography: Noble Cider in a noble way

One of our latest speculative projects has been to photograph the recent to-bottle Noble Cider, another Asheville nc local business. We wanted to create a way to display the beautiful bottles, and the rich colors of the cider inside, but we also wanted to go a step further. In this case we designed the project to resemble an illuminated manuscript. That is, a decorated and illustrated manuscript in a tradition that dates back in some cases over a thousand years, which usually includes gold leaf and intricate detail. 

Our goal ultimately was to create a strong commercial image that carries some of the spirit of these old periods, and merges with their existing middle age's motif. The message is that cider has a lot to do with the history of alcohol; and it can tastes incredible too!

I think I like the Spice Merchant the best myself, but The Golden Arrow is a close second.


The wacom way

Pen tablet--a tech that makes our work precise, efficient and one that I could not draw digitally without. There's a pen that is pressure sensitive, depending on the model there varied nibs and some also have quick access buttons near your fingers that you can assign.   The tablet mirrors your screen, this is adjustable, but the idea is absolute positioning (this can take a little getting used to but it is well worth it).  And its wireless!  Working digitally is very forgiving and can also streamline complex endeavors, copying and transforming your way to lacy extravagance.  

Its a metaphor for the internet age, you can learn anything you want, with digital art you can do anything you want--but you have to figure out what to do with all that.  For me going into work mindfully is really important, turning a project over for a week or two before I start to actually put it down, then the project can be rendered somewhat quickly and then its back to pondering.  I follow the guideline of one of my favorite painting teachers, Tom Edgerton, who says finishing work is 90% looking and 10% doing! 

Product photography: Lusty Monk Mustard

We shot a new local product, Lusty Monk Mustard for another speculative commerical product photography shoot. This mustard is like the best mustard in the world, and we cant go on without them using our high quality product photography. We lit these jars with very soft defuse light and isolated them on both black and white, to create bold descriptive stock shots of their lustful product. 

Asheville loves this mustard, and we are helping to 'spread the lust' as these mustard makers say. 

product photography asheville nc_studio product shots_Kepchar0011.jpg

Commercial product photography and design: illustrating Yerba Maté Synergy Bars

Merryn Stanfield illustrated our latest spec product shoot, Yerba maté synergy bars.  These things are a great tasting and filling energy bar made with Mate Factor local organic yerba maté. This illustration was rendered entirely digitally and features the ingredients of each bar in beautiful two tone drawings. We wanted to display the simplicity of ingredients, in the spirit of raw and organic food, while creating a strong commercial look to invite the eyes of hungry shoppers. The project came together with the clean use of balanced secondary colors and a repetition of form to maintain unity.  Merryn sampled the bars over and over in the search of the perfect pixels with the most appetizing hue. We think we accomplished our goals and are super happy with the results!

We love these bars, and we want others to find this great product. We feel sure this will help! You can order this product through their website and see a list of stores that carry them.

An impromptu photo competition

This week John entered a photo competition put on by the one and only, Ken Wheeler, also know as 'The Angry Photographer'. We don't normally focus on competitions but the prize for this one was a little too hard to pass up. 

Ken is giving away one of the new Digi-Bee Alien Bees DB400s to the winner, and we really want to get our hands on this new unit. It functions a lot like its older brother the Alien Bee B400 B800 and B1600 but it allows for remote adjustment, it has a one stop larger strobe output range, and it has an LED 400w daylight balanced modeling lamp!

In short, it has the potential to be another great strobe light in the studio while also acting as a portable, daylight balanced hot light for video. 

So the contest was: take a photograph of something held in your own hand, that was the size of, or smaller than, your hand. That was about it, very open, intriguing. Here is John's entry. We'll let you know if we win the light and just how sweet it is! And if we don't win we will buy one, and then let you know just how sweet it is!!

Update: We Lost! O well, it was a lot of fun. We bought one, its sweet! 

Product photography: an underwater shoot

Keeping up with our unconventional materials shoots, our latest spec shoot involved a water aerator, a large fish tank and several doses of glass cleaner.

This shoot was all about highlighting Defiant Whisky's alter ego Defiant Marine, a commercial diving company that does some really cool work. You can learn their story on Defiant's website: defiantwhisky.com. Our art director, Merryn Stanfield, wanted to make this connection while maintaining a clean commercial aesthetic. We think the end product has a pleasing ocean feel while being a refreshing and alluring beverage shot. 

This shoot required a complex lighting set-up and a lot of compositing to pull off. The final image is 7 different images composited into one. The bottle's glow and background are one image, the front label is another, and the top of the bottle is another.  The bubbles are from three different shots, and the water's surface is the final image that makes up this shot. 

We are proud of this one, and we hope Defiant will be too!


The set-up shot was kind of negletcted on this shoot. But here is an early snapshot with some of the secrets of the image in it.


Product photography lighting tips: Another new way to shape light in the studio

We finally got the right EKE bulb for our Nikon Mark II Fiber Optic Light, and its really cool. The fiber optic light with its flexible 'arms' is perfect for precise lighting. And its fast, really fast, to setup a nice small set. 

We seem to be building a rather unique 3250k lighting set here in the studio now that we have the fiber optic light working, and color matched to our new favorite microscope light. I find that I have never disliked a Nikon product including these old lights. Working with these lights is quick, and stable, and a lot of fun.  

The image of the Praktiflex at bottom was taken with only the new Nikon light, and you can see the unit itself in the background of the setup picture. 

old camera 1.jpg